Leave Your Message

How to Choose Wood Casement Windows for Your Project?

Choosing Wood Casement Windows involves more than comparing attractive profiles and price tags. The right decision begins with your project’s climate, wall structure, orientation, and daily ventilation needs. A south-facing room may require low-emissivity glazing and exterior shading. A damp coastal site needs durable timber, reliable coatings, and carefully sealed joints. Small details matter.

This guide draws on practical window selection experience and established building principles. It explains how wood species, frame depth, glazing, hardware, energy performance, and installation quality affect long-term results. You will also learn how to check supplier credentials, product testing, warranties, and maintenance requirements. Ask for performance evidence, not vague promises. A well-made window can still fail when installed poorly. That point is easy to overlook.

We will compare design choices for renovation and new construction projects. We will consider sightlines, opening clearances, security features, and cleaning access. Real rooms create real constraints. A narrow hallway may limit the sash opening. An exposed elevation may demand stronger weather protection. No recommendation fits every building. Even experienced designers can miss a drainage detail or underestimate future repainting work. That is worth remembering.

By the end, you should have a clearer method for selecting Wood Casement Windows with confidence. The aim is not merely visual appeal. It is a balanced choice that supports comfort, durability, authenticity, and responsible project planning.
How to Choose Wood Casement Windows for Your Project?

Definition and Key Features of Wood Casement Windows

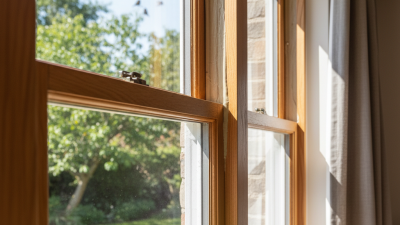
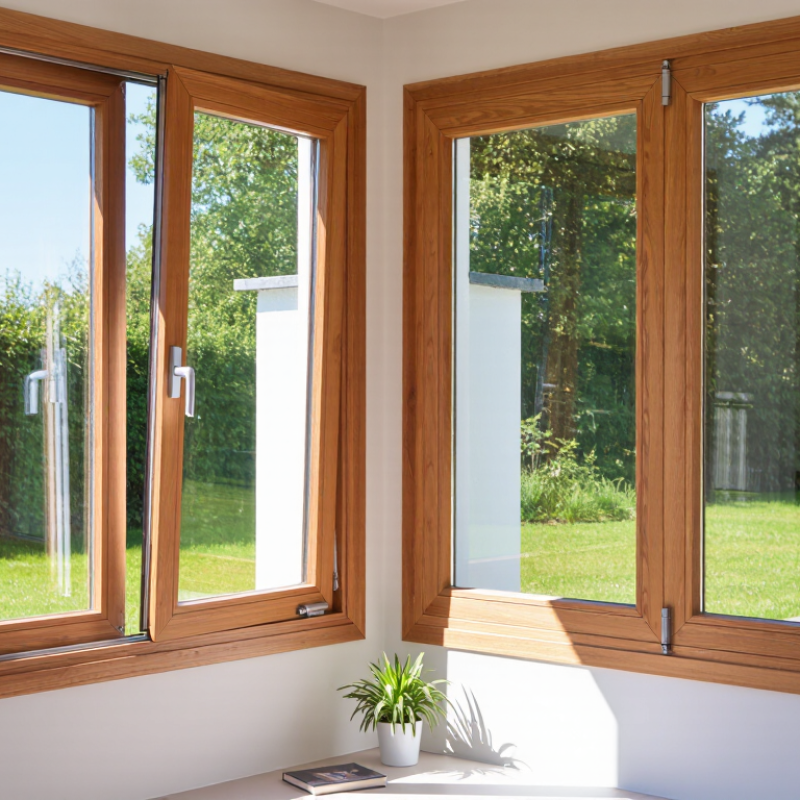
Wood casement windows are windows hinged at the side. They open outward with a handle or crank. Their design creates a wide opening for fresh air and clearer views. A timber frame also adds warmth through visible grain, natural color, and a solid hand feel. Key features include insulated glass, weather seals, locking hardware, and durable protective coatings. These parts work together, not separately.

When choosing them, study the room’s orientation and local weather. A south-facing window may need solar-control glass. A coastal project may require stronger moisture protection and corrosion-resistant hardware. Check the frame depth, opening direction, ventilation needs, and emergency access. Do not judge quality from appearance alone. Ask for tested air leakage, water resistance, thermal performance, and installation details. A qualified installer should confirm the wall structure and drainage path before ordering.

Wood needs care, even when the finish looks tough. Wipe exposed surfaces, inspect joints, and renew coatings when they begin to weaken. Small cracks can admit water. That becomes expensive. I would avoid selecting a large casement window only for its dramatic appearance. Heavy sashes may need stronger hinges and careful alignment. This is where many projects become less elegant than planned. A well-designed window balances daylight, maintenance, security, energy performance, and daily comfort.
Assessing Your Project’s Window Requirements

Assessing Your Project’s Window Requirements

Choosing wood casement windows starts with the building, not the frame style. Record each opening’s width, height, orientation, and exposure to rain. South- and west-facing windows may receive intense afternoon heat. The U.S. Department of Energy estimates that windows can cause 25% to 30% of residential heating and cooling energy use. That figure makes glass selection important, not decorative. Review the window’s U-factor and solar heat gain coefficient. Lower U-factor generally improves insulation, while the right SHGC depends on climate and orientation. A certified rating from the National Fenestration Rating Council provides more dependable comparisons.

Consider how the room will function daily. Casement sashes need clearance outside and inside, especially near walkways, shrubs, curtains, or furniture. In a kitchen, a handle behind a faucet can become an annoying detail. In a bedroom, confirm ventilation and emergency-exit requirements before ordering. Wood offers a warm finish and useful insulating performance, but exposed surfaces need suitable protection and regular inspection. Moisture damage often begins at neglected edges, not the center of the sash. I have seen attractive specifications fail because drainage and maintenance were treated as afterthoughts.

Tips: Request a window schedule before purchasing. List every opening, glass direction, dimensions, operation, and finish. Ask for tested air leakage, water resistance, and structural performance data. Leave installation tolerances for uneven masonry. Measure twice. Small errors become expensive. Do not select identical glass for every elevation; local sun, wind, and shade conditions deserve separate decisions.

How to Choose Wood Casement Windows for Your Project? - Assessing Your Project’s Window Requirements

Requirement What to Assess Typical Guidance Recommended Wood Casement Window Specification Project Check
Climate and Exposure Local temperature range, rainfall, wind, sunlight, and coastal exposure Weather exposure directly affects glazing, seals, exterior finish, and maintenance intervals Use factory-applied exterior protection, durable weather seals, corrosion-resistant hardware, and suitable timber treatment Confirm local design-wind and moisture requirements
Window Orientation Direction the window faces and amount of direct solar exposure South-, west-, or unobstructed-facing windows may receive higher solar heat gain, depending on hemisphere and season Select glazing with an appropriate solar heat-gain coefficient and consider exterior shading Record orientation and nearby shading devices
Thermal Performance Target whole-window U-factor, frame construction, glazing, and spacer type Lower U-factor generally indicates lower heat transfer through the complete window assembly Consider insulated low-emissivity double glazing for moderate climates and triple glazing where lower heat loss is required Specify a whole-window value rather than glass-only performance
Glazing Configuration Number of panes, low-emissivity coating, gas fill, safety glass, and acoustic needs Double glazing is common; triple glazing can improve insulation but adds weight and cost Use insulated glass units with sealed cavities; select laminated or tempered safety glass where required by code or location Check glass thickness, weight, and safety-glazing zones
Ventilation Need for controlled natural ventilation and opening position Casement sashes can direct airflow into a room when opened, subject to weather conditions Choose the opening direction, sash size, and restrictor hardware according to room use and wind exposure Confirm whether left-, right-, or paired-opening sashes are needed
Air Leakage Compression seals, frame joints, hardware adjustment, and installation quality Lower tested air-leakage rates generally improve comfort and energy performance Use continuous compression gaskets, accurately machined joints, and independently tested assemblies Request tested air-infiltration data for the complete unit
Water Resistance Drainage paths, sill design, flashing, gaskets, and installation detailing The sill and perimeter interface are especially important in wind-driven rain conditions Specify sloped sills, effective drainage, compatible flashing, and a properly sealed rough opening Review installation drawings before ordering
Structural and Wind Loads Building height, opening size, local wind speed, exposure category, and mullions Larger sashes and high-wind locations require stronger frames, hinges, and anchorage Use engineered timber where appropriate and verify the complete unit’s structural test rating Obtain project-specific structural calculations when necessary
Opening Size and Proportion Rough-opening dimensions, frame depth, sightlines, and sash weight Oversized operable sashes may be difficult to operate and place greater loads on hinges Divide very large openings into multiple lights or fixed-and-opening combinations where practical Verify dimensions on site before fabrication
Emergency Egress Clear opening, opening height and width, sill height, and room occupancy Bedrooms and habitable rooms may require an emergency escape opening under local code Select hardware and sash dimensions that achieve the required clear opening, not just the nominal frame size Confirm requirements with the applicable building authority
Security Lock points, hinge protection, hardware strength, and glass selection Security performance depends on the complete window, frame, glass, hardware, and installation Use multi-point locking, robust hinges, laminated glass where appropriate, and secure perimeter fixing Specify security requirements before finalizing hardware
Acoustic Control Traffic noise, aircraft noise, neighborhood activity, and wall construction Different glass thicknesses and laminated interlayers can improve sound reduction at selected frequencies Request tested sound-reduction data for the complete window assembly and installation Identify the dominant noise source and target performance
Timber Durability Timber species, moisture exposure, end-grain protection, and coating system Good detailing and regular coating maintenance help reduce moisture-related movement and decay risk Choose stable, suitably durable timber with sealed end grain and a maintainable exterior finish Request care instructions and expected refinishing intervals
Maintenance Access Exterior reach, building height, cleaning access, and finish upkeep Windows that are difficult to reach may require specialist access equipment for maintenance Select durable coatings, accessible hardware, and opening sizes that allow safe cleaning Include a long-term maintenance plan in the project budget
Budget and Service Life Purchase price, installation, glazing upgrades, maintenance, and expected service life The lowest initial price may not provide the lowest whole-life cost Compare complete installed costs, warranty terms, maintenance needs, and replacement-part availability Evaluate total cost over the planned ownership period

Note: Final performance requirements should be verified against the building code, climate zone, local wind and water conditions, and the tested performance of the complete window assembly.

Comparing Wood Types, Glazing, and Frame Designs

How to Choose Wood Casement Windows for Your Project?

Comparing Wood Types, Glazing, and Frame Designs

Choosing wood casement windows begins with the wood species, not the finish. Softwoods such as pine can control costs and accept paint smoothly. Hardwoods, including oak or mahogany, offer dense grain and a substantial feel. However, density alone does not guarantee durability. Moisture exposure, drainage, and maintenance often matter more than appearance. I once saw a beautiful sample fail early because its lower edge held rainwater.

Glazing affects comfort, sound, and solar performance. Low-emissivity double glazing suits many climates, while triple glazing may help in severe cold or noisy streets. Ask for the whole-window U-value, not glass-only figures. That distinction is easy to miss. Warm-edge spacers and inert-gas cavities can reduce heat transfer, but installation quality still decides performance. For a west-facing room, lower solar gain may reduce afternoon overheating.

Frame design controls sightlines and water management. A narrow frame admits more daylight, yet it may leave less structural room for hardware. Multi-point locks and properly sized hinges should move without rubbing. Check the sill slope, drip edges, and exposed end grain before ordering. Opening direction must suit furniture, cleaning access, and emergency egress requirements. I would not choose from a brochure alone. Operate a full-size sample if possible. Even experienced buyers can overvalue color and undervalue maintenance access.

How to Choose Wood Casement Windows for Your Project?

Comparing wood types, glazing, and frame designs through representative thermal and material data

Wood Types

Pine and Douglas fir generally provide lower thermal conductivity than oak, while oak offers greater density and hardness. Larch provides a middle-ground option with good dimensional stability and natural durability.

Glazing Selection

Typical center-of-glass U-values are about 5.8 W/m²·K for single clear glass, 1.1 W/m²·K for double low-emissivity argon glazing, and 0.6 W/m²·K for triple low-emissivity argon glazing. Lower values indicate better insulation.

Frame Design

Solid timber frames emphasize natural appearance, laminated timber improves dimensional stability, and wood-aluminum frames add exterior weather protection with reduced maintenance requirements.

Wood values shown are representative figures at typical building moisture conditions. Actual performance varies with species, moisture content, grain direction, section thickness, glazing spacer, installation quality, and window configuration.

Checking Energy Performance, Durability, and Maintenance Needs

Choosing wood casement windows starts with energy performance, not appearance alone. The U.S. Department of Energy estimates that windows can account for 25–30% of residential heating and cooling energy use. Check the NFRC label for whole-window U-factor and solar heat gain coefficient, rather than glass-only claims. Lower U-factor improves insulation. SHGC should match your climate and facade exposure. ENERGY STAR Version 7.0 uses climate-specific limits, so one specification cannot suit every project. Small details matter. A north-facing window needs different performance than a large west-facing unit.

Durability depends on water management and installation quality. The AAMA/WDMA/CSA 101/I.S.2/A440 standard evaluates air leakage, water penetration, and structural performance. Ask for tested performance values and examine sill drainage paths. On site, I would look for sloped exterior sills, sealed end grains, and flashing that directs water away from the frame. Wood remains vulnerable when paint cracks or moisture stays trapped. The WDMA Window Selection Guide recommends regular inspection and finish maintenance, especially on exposed elevations. Check joints each spring, then repair early coating failure. Honestly, maintenance schedules are often underestimated. A shaded window may look sound while its lower corners absorb moisture. Choose factory-applied finishes carefully, but do not treat them as maintenance-free. Recheck condensation, hardware movement, and sealant condition after the first heating season. (Sources: U.S. DOE Energy Saver, 2023; NFRC Fenestration Performance Ratings; ENERGY STAR Residential Windows, Doors, and Skylights Version 7.0; AAMA/WDMA/CSA 101/I.S.2/A440.)

Selecting a Reliable Supplier and Planning Installation

How to Choose Wood Casement Windows for Your Project?

Selecting a Reliable Supplier and Planning Installation

A dependable supplier should provide clear timber specifications, accurate drawings, and realistic delivery dates. Ask where the wood comes from and how it is treated. Moisture-resistant finishes matter, especially in wet climates. Request samples before placing a large order. The frame should feel solid, close smoothly, and show consistent joints. Check warranty terms, replacement procedures, and technical support. A supplier who avoids detailed answers may create problems later. My early projects taught me that attractive samples do not guarantee careful production.

Installation planning deserves equal attention. Confirm every opening size on site, rather than trusting old drawings. Leave suitable space for adjustment and insulation. The installer should protect the sill with flashing and provide a clear drainage path. Windows must remain square during fixing. Poor alignment can cause sticking, drafts, and damaged hinges. Delivery timing also matters. Store units upright, dry, and away from direct sunlight. Do not rush installation after a wet delivery.

Tips: Choose an installer with proven timber-window experience. Ask for recent project references and photos. Discuss wall thickness, reveal depth, opening direction, and interior trim before work begins. Record measurements twice. I still find small site changes easy to miss, so a written checklist is worth the extra minutes. Include maintenance access in the plan. Wood needs periodic inspection, even when the finish looks excellent.